Manage your inventory on Roc Terminal+
Roc Terminal+ web portal
You can use Roc Terminal+ web portal to manage your inventory, including:
- Import an inventory - Use a template to import an existing inventory.
- Export your inventory - Export your inventory as a spreadsheet.
Import your inventory
Before you import an inventory, make sure that each item has a unique stock keeping unit (SKU) number. If you import an item with the same SKU as an existing item, the system replaces the existing item.
To import an inventory, complete the following steps:
- Download the inventory template.
- Fill out the template.
- Upload your template.
- (Optional) Review your upload progress.
Step 1: Download the inventory template
- Log in to https://terminalplus.rocpos.com/login.
- On the side menu, select Settings.
- Select the Product tab.
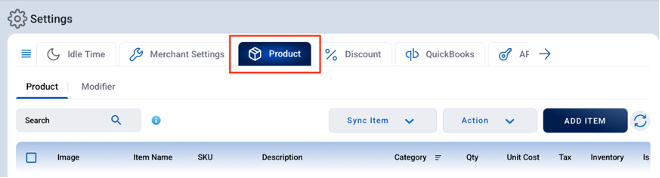
- From the Action dropdown menu, select Sample File.
- Select your preferred file format. To help prevent errors, we recommend that you use the CSV format.
- Select DOWNLOAD.
Step 2: Fill out the template
Fill out the template, and then save the file. For each item, enter the following item details:
| Field | Required? | Description |
|---|---|---|
| SKU | Optional | Stock keeping unit (SKU) number, which is a unique identifier that you assign to the item. |
| DESCRIPTION | Required | Description of the item. |
CATEGORY | Required | Category of the item. Important: Don’t use any of the following special characters: `!"#$%&'()*+,-./:;<=>?@[\]^_{}. To add a category that includes special characters, you must add the item individually. |
QUANTITY | Conditional | Number of units you have in stock. You can complete this field only if you enter YES in the INVENTORY field. |
| UNITCOST | Required | Cost of one unit of item in dollars. |
TAXABLE | Required | Indicates whether taxes apply to the item. Enter one of the following options:
|
INVENTORY | Required | Indicates if you want to track the stock count for the item. Enter one of the following options:
|
IS_PINNED | Optional | Indicates if you want to pin the item to the top of the inventory list. You can pin multiple items. Enter one of the following options:
|
PINNED ORDER | Conditional | Position of the pinned item in the inventory list, for example, if you enter 3, the item displays at the 3rd position from the top. You can complete this field only if you enter YES in the IS_PINNED field. |
STATUS | Required | Indicates whether you want to display the item in your inventory. Enter one of the following options:
|
ITEM NAME | Required | Name of the item. Important: Don’t use any of the following special characters: `!"#$%&'()*+,-./:;<=>?@[\]^_{}. To add an item name that includes special characters, add the item individually. |
The following image shows an example of a completed template:

Step 3: Upload your template
- On the side menu, select Settings.
- Select the Product tab.
- From the Action dropdown menu, select Import.
- Select your file.
- To confirm your upload, select YES.
Step 4: (Optional) Review your upload progress
If the file contains more than 25 items, you can use the Upload Center to check the upload progress.
- On the File Uploaded screen, select OK.
- From the Action dropdown menu, select Upload Center.
- View the status of your upload:
- PENDING - File is waiting to be processed.
- INPROGRESS - Upload is in progress.
- COMPLETED - Upload is complete or unsuccessful. If the upload is unsuccessful, select Failed Products to view the list of errors.
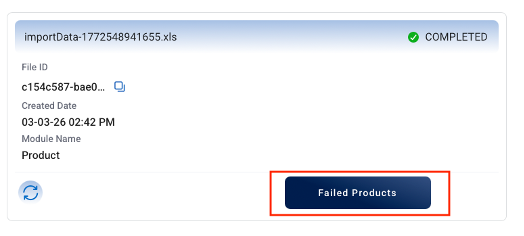
After you successfully import your file, the items appear in your inventory and automatically sync across all your devices.
Export your inventory
When you export your inventory, we include the following fields:
| Field | Description |
|---|---|
| SKU | Stock keeping unit (SKU) number, which is a unique identifier that you assign to the item. |
| DESCRIPTION | Description of the item. |
| CATEGORY | Category of the item. |
| QUANTITY | Number of units you have in stock. |
| UNITCOST | Cost of one unit of item in dollars. |
| TAXABLE | Indicates whether taxes apply to the item. |
| INVENTORY | Indicates whether you track the stock count for the item. |
| IS_PINNED | Indicates whether you pinned the item to the top of the inventory list. |
| PINNED ORDER | Position of the pinned item in the inventory list. |
| STATUS | Indicates whether you display the item in your inventory. |
| ITEM NAME | Name of the item. |
| UNIT OF MEASURE | Cost of one unit of an item in dollars and its unit of measure, for example, 20.00 Each. |
| COMMODITY CODE | Code that identifies the type of item. |
To export your inventory, complete the following steps:
- Log in to https://terminalplus.rocpos.com/login.
- On the side menu, select Settings.
- Select the Product tab.
- From the Action dropdown menu, select Export.
- Select your preferred file format.
- Select EXPORT.